Templates & Styles#
django-dashboards comes with a set of default templates and styles but these can be easily customised to fit your needs.
Design#
django-dashboards comes with a default css stylesheet which includes a grid layout as well as basic styling for each component.
This is enough to get you started but it is expected that you would either build on this or replace it.
Setting up a Base Template#
When starting a new project the first thing you probably want to do is add your own base template which incorporates your branding and any navigation elements which may be required.
This works exactly the same as in Django so this should be familiar to you if you are coming from a Django background.
# templates/dashboards/base.html

<!DOCTYPE html>
<html lang="en">
    <head>
        <title>django-dashboards | {% block title %}{{ dashboard.get_meta.name }}{% endblock title %}</title>
        <meta charset="utf-8">
        <meta name="viewport" content="width=device-width, initial-scale=1, shrink-to-fit=no">
        {% block dashboards_js %}{% endblock dashboards_js %}
        {% block dashboards_style %}{% endblock dashboards_style %}
    </head>
    <body hx-headers='{"X-CSRFToken": "{{ csrf_token }}"}'>
        {% block body %}
            {% block content_title %}{% endblock content_title %}
            <div class="content">
                {% block content %}{% endblock content %}
            </div>
        {% endblock body %}
    </body>
</html>
This is the default HTML code in django-dashboards. When creating your own base template you should follow this so you don’t loose any content blocks.
...
<body hx-headers='{"X-CSRFToken": "{{ csrf_token }}"}'>
    {% block body %}
        <div class="logo">
            <img src="{% static "logo.png %}" />
        </div>
        {% block menu %}
          {% include "includes/menu.html" %}
        {% endblock menu %}
        {% block content_title %}{% endblock content_title %}
        <div class="content">
            {% block content %}{% endblock content %}
        </div>
        <div class="footer">
            {% block footer %}{% endblock footer %}
        </div>
    {% endblock body %}
</body>
...
Here we have added a logo, menu and footer element. See Menus for a description on how to generate a menu based on your dashboards.
Dashboard Template#
If you have created a base template which is not in the
folder templates/dashboards/base.html or you
simply want to change how the default dashboard page looks you
can do this by creating a dashboard.html
file in templates/dashboards/.
# templates/dashboards/dashboard.html

{% extends "dashboards/base.html" %}
{% load static %}
{% load dashboards %}

{% block dashboards_js %}
    {{ block.super }}
    {% include "dashboards/includes/static/js.html" %}
{% endblock %}

{% block dashboards_style %}
    {{ block.super }}
    {% include "dashboards/includes/static/style.html" %}
{% endblock %}

{% block content_title %}
  <h2>{{ dashboard.get_meta.name }}</h2>
{% endblock %}

{% block content %}
  <div class="dashboard-container">
    {% render_dashboard dashboard %}
  </div>
{% endblock %}
This example is the default django-dashboards file.
The file should extend from base.html and you should populate / add the
blocks as required. If you have created your own base template make sure
to update the extends path.
CSS#
django-dashboards comes with its own css styles which are imported from the file
dashboards/includes/static/style.html If you want to continue
using these styles make sure
{% include "dashboards/includes/static/style.html" %}
is present in the dashboards_style block.
If you wish to remove the base styles you can either: create your own
dashboards/includes/static/style.html file locally or
set the block to empty if you are overriding dashboard.html or base.html
{% block dashboards_style %}{% endblock %}
django-dashboards includes Datatables for the Table component and requires
dashboards/vendor/css/datatables.min.css for styling.
If you have removed dashboards/includes/static/style.html remember
to add this import somewhere or your tables will not be styled.
If you want to include your own stylesheet(s) as well as the default one, you can either:
Create a dashboards/includes/static/style.html locally
which imports dashboards.css
Or
Include them in your local dashboard.html or base.html file
{% block dashboards_style %}
    {% include "dashboards/includes/static/style.html" %}
    <link rel="stylesheet" href="{% static 'demo/css/styles.css' %}">
{% endblock %}
If adding them to base.html you will need to have {{ block.super }}
in the dashboard.html dashboards_style block.
JS#
Just as with CSS, you can override the default JS files used by:
creating your own dashboards/includes/static/js.html, or changing
the dashboards_js block in base.html or dashboard.html
{% block dashboards_js %}
    {{ block.super }}
    {% include "dashboards/includes/static/js.html" %}
{% endblock %}
This is useful if you want to add extra Javascript files to your project or have custom components which require additional JS libraries.
Another reason you may override this is if you are wanting to add a build tool such as Vite JS or Webpack to your project to replace the default setup.
django-dashboards needs certain js libraries to function correctly so check which
libraries are in
dashboards/includes/static/js.html before making changes.
render_dashboard template tag#
The code which actually renders the dashboards is
...
{% render_dashboard dashboard %}
...
This uses the template tag render_dashboard from dashboards and takes
the dashboard object and renders it to the page.
Using this template tag allows you to render a dashboard to any template you wish. So, if you had a custom view which required a dashboard object you could use this in the template to display the dashboard.
Overriding Default Component Templates#
Each Component, including LayoutComponents, come with their own template file which can be overriden to fit your needs.
To override the default template simply create a file in your templates
folder which matches the path for the component (see below).
Components:
Chart- dashboards/components/chart/chart.htmlForm- dashboards/components/form/form.htmlMap- dashboards/components/form/map.htmlTable- dashboards/components/table/index.htmlBasicTable- dashboards/components/table/basic.htmlHTML- dashboards/components/table/html.htmlStat- dashboards/components/table/stat.htmlText- dashboards/components/table/text.html
Replacing these files will update all components on a dashboard.
If overriding a Component file, note that some of the more advanced components require boilerplate code to function so you should only do this if absolutely necessary.
Updating a LayoutComponent template is safer and probably more likely.
LayoutComponents:
Card- dashboards/layout/components/card.htmlDiv- dashboards/layout/components/div.htmlTab- dashboards/layout/components/tab.html, dashboards/layout/components/container.html, dashboards/layout/components/content.html
The default templates come with their own structure and css applied but this may not fit your needs. For example if you have integrated Bootstrap you may want to change the Card component to match the HTML of a Bootstrap card.
LayoutComponent CSS Classes#
There maybe cases where you just need to alter the css classes on a component rather than changing the HTML. An example could be if you are using Bootstrap css you may want the component to include some additional Bootstrap helper classes.
django-dashboards allows you to change the default css classes for any Component or
LayoutComponent via the setting DASHBOARDS_LAYOUT_COMPONENT_CLASSES
and DASHBOARDS_COMPONENT_CLASSES.
DASHBOARDS_LAYOUT_COMPONENT_CLASSES#
The value should be a dict containing all or any keys Card, Tab, Div,
with each key being either a dictionary depending on
requirement - see defaults below.
The default classes are
CARD_CLASSES: Dict[str, str] = {
    "card": "card_component__card",
    "header": "card_component__card-header",
    "image": "card_component__card-img",
    "body": "card_component__card-body",
    "footer": "card_component__card-footer",
}

TAB_CONTAINER_CLASSES: Dict[str, str] = {
    "tab_container": "tab_component__container",
    "tab_list": "tab_component__tabs",
    "tab_content": "tab_component__content",
}

TAB_CLASSES: Dict[str, str] = {
    "li": "tab_component__li",
    "link": "tab_component__link",
}

DIV_CLASSES: Dict[str, str] = {
    "wrapper": ""
}
For example to update the header class for Card you would add
DASHBOARDS_LAYOUT_COMPONENT_CLASSES = {
    "Card": {
        "header": "alternative-card-header",
    }
}
To your settings.py file.
Any keys not defined will default to the original definition.
DASHBOARDS_COMPONENT_CLASSES#
The value should be a dict containing all or any keys Form, Table,
BasicTable, Stat and Chart with each key being either a
string or dictionary depending on
requirement - see defaults below.
The default classes are
FORM_CLASSES: Dict[str, str] = {
    "form": "form",
    "table": "table form-table",
    "button": "btn",
}

TABLE_CLASSES: Dict[str, str] = {
    "table": "table"
}

STAT_CLASSES: Dict[str, str] = {
    "stat": "stat",
    "icon": "stat__icon",
    "heading": "stat__heading",
    "text": "stat__text",
}
For example to update the stat class for Stat you would add
DASHBOARDS_COMPONENT_CLASSES = {
    "Stat": {
        "stat": "stat",
        "icon": "stat__icon",
        "heading": "stat__heading",
        "text": "stat__text",
    }
}
To your settings.py file.
Any keys not defined will default to the original definition.
Setting an Alternative Template#
Both Dashboard and Component objects allow you to provide
an alternative template when creating them. This allows you to customise
the layout on an instance by instance basis.
Custom Dashboard Template#
You can override the default dashboard template by
providing a template_name to the dashboards Meta class.
# dashboard.py
...
class DemoDashboardCustomTemplate(Dashboard):
    ...
    class Meta:
        name = "Custom Template"
        template_name = "demo/custom.html"
...
Note
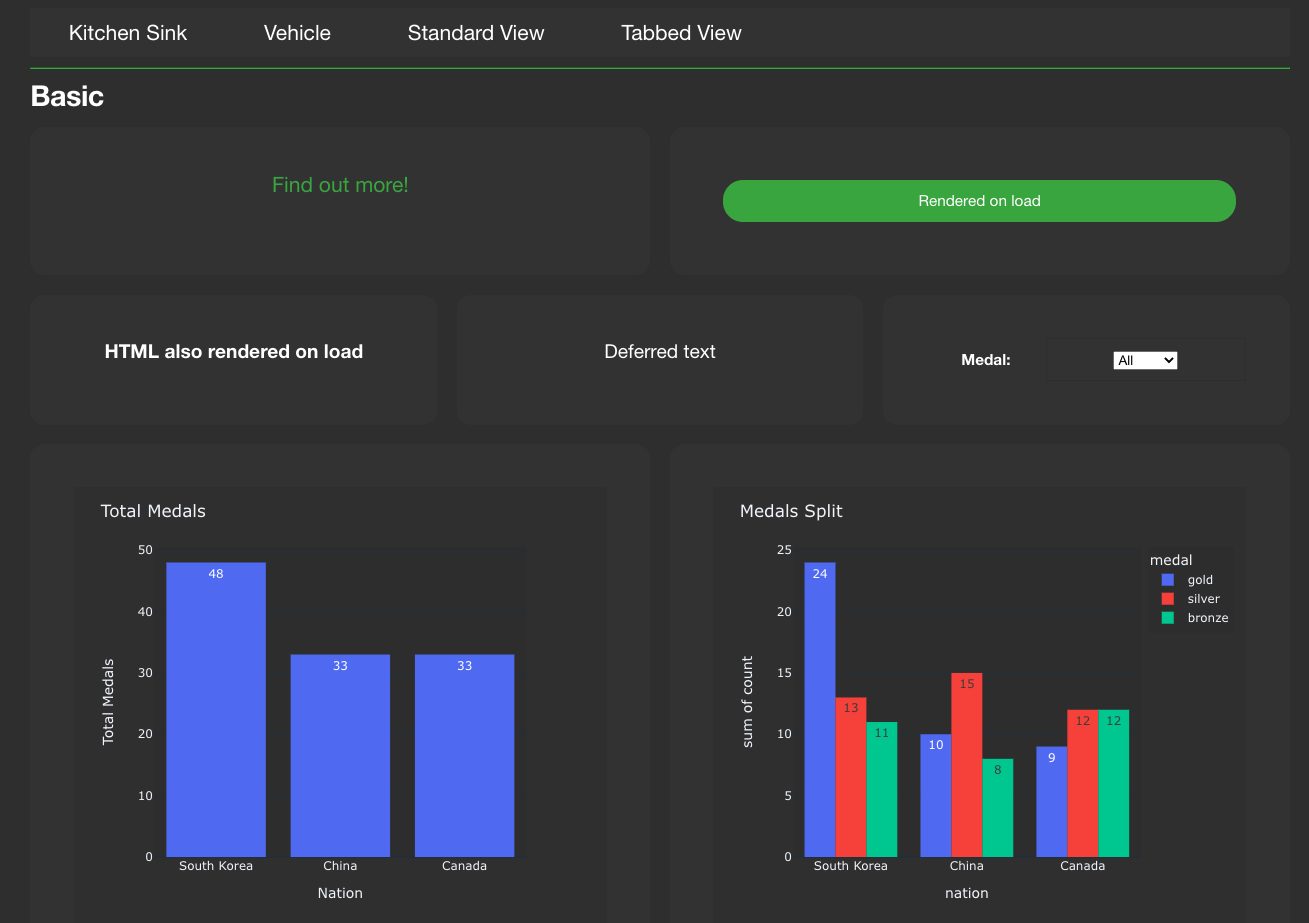
The full example code for this dashboard is available in the repo at demos/dashboard/demo/kitchensink/dashboards.py
This is useful if you wish to create a complex layout that
is not possible via the LayoutComponent or grid css classes - see Layouts.
You may also use this if you wish to add additional HTML elements which are
not present in the Dashboard and don’t want to do it via Layout.
# templates/demo/custom.html
<div class="span-6" style="display: flex; flex-direction: column; justify-content: space-evenly;">
    <h3>Text Blocks</h3>
    <hr style="color: white; width: 100%" />
    {{ dashboard.components.text_example }}
    {{ dashboard.components.html_example }}
    {{ dashboard.components.calculated_example }}
</div>

<div class="span-6">
  <p>
    Lorem ipsum dolor sit amet, consectetur adipiscing elit. Vestibulum purus sapien, sodales in accumsan eget,
  </p>
    {{ dashboard.components.chart_example }}
</div>
<p class="span-12">
  Lorem ipsum dolor sit amet, consectetur adipiscing elit. Vestibulum purus sapien, sodales in accumsan eget,
  tempus sit amet nisl. Cras nec erat porttitor, maximus mauris eget, elementum eros.
  Nullam erat massa, lobortis id velit non, viverra fringilla nunc.
  Morbi in urna vel ante faucibus blandit ac non quam.
</p>
<div class="span-12" style="display: flex; border: 1px dotted #dddddd;">
  <h3>Chart + Stat Blocks</h3>
    <div style="flex: 2">
        {{ dashboard.components.line_chart_example }}
    </div>
    <div style="flex: 1">
        {{ dashboard.components.stat_three }}
    </div>
</div>
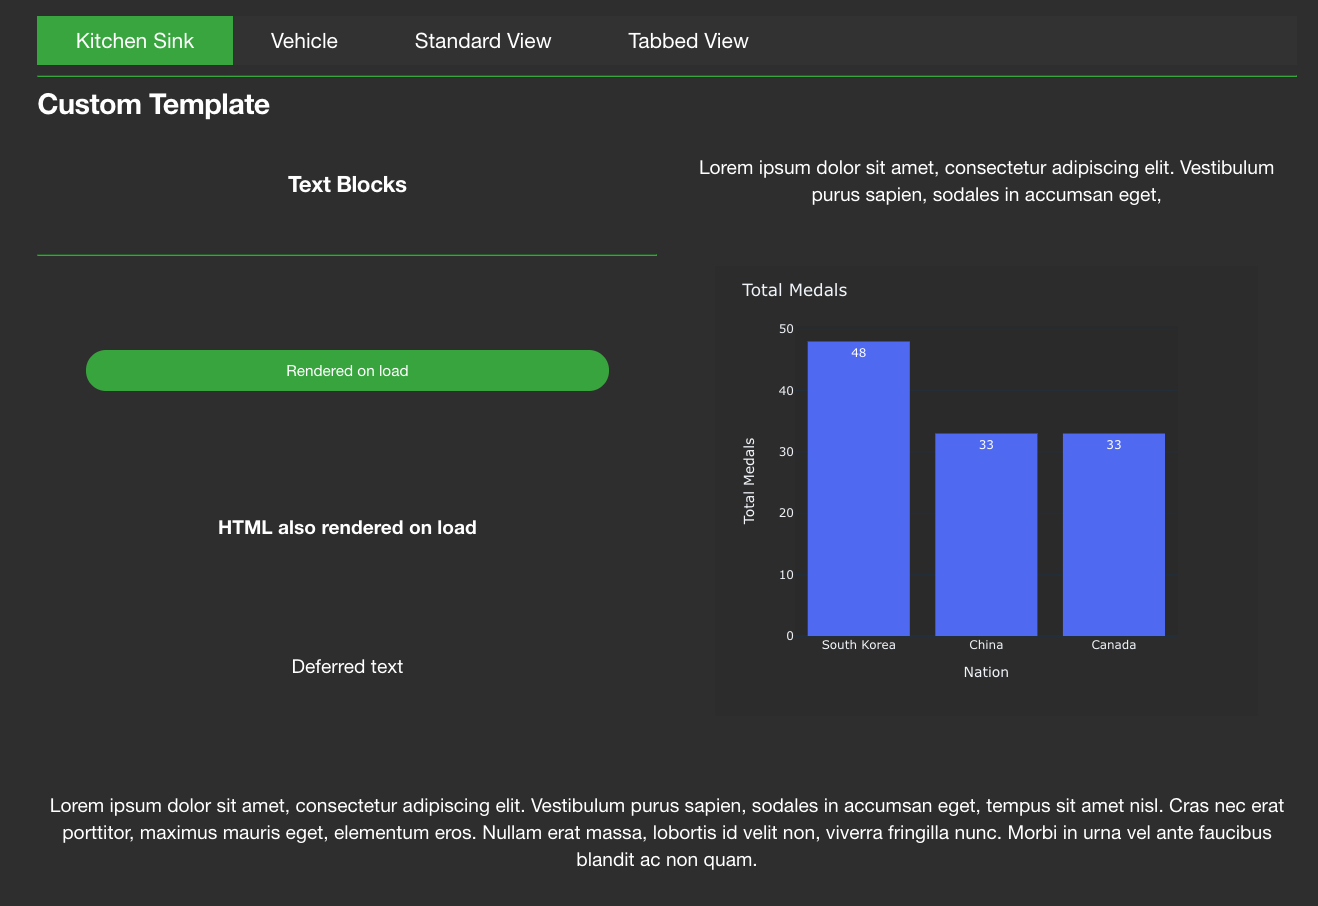
Note
you access individual components from the components attribute
on the dashboard object. Keys should match the attribute name in
the Dashboard class.
Custom Component Templates#
Like dashboards, each component has its own default template which can be overriden.
# dashboard.py
...
class DemoDashboard(Dashboard):
    pill = Text(value="Lorem ipsum dolor sit amet", template_name="demo/pill.html")
...

# templates/demo/pill.html
<div style="background-color: lightskyblue; border-radius: 20px; padding: 10px 5px; margin: 10px; font-size: 0.8em;">
  {% if component.mark_safe %}
  {{ rendered_value|safe }}
  {% else %}
  {{ rendered_value }}
  {% endif %}
</div>
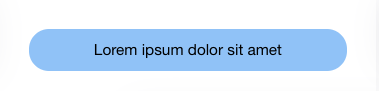
As some of the more advanced components require boilerplate code to function you should only do this if absolutely necessary.
If you do, make sure to review the original template first.
Alternative loading message#
By default django-dashboards shows the text “Loading…” while a deferred component
is loading. You can change this by creating your own a loading.html
template in the folder templates/dashboards/components/
# templates/dashboards/components/loading.html
<div class="loading-img">
    <img src="/path/to/loading.gif" />
</div>

Changing the Default Grid Layout#
Dashboards follow a grid layout with a default of 2 components per row.
You can change this by adding DASHBOARDS_DEFAULT_GRID_CSS to your settings
file.
DASHBOARDS_DEFAULT_GRID_CSS = "span-6"
The value should match a css class available in the stylesheet(s). The following classes are available in dashboards.css:
span-3- 4 columnsspan-4- 3 columnsspan-6- 2 columnsspan-8- 1 column 2/3 fullspan-9- 1 column 3/4 fullspan-121 column
This can also be done at component level - see Layouts.